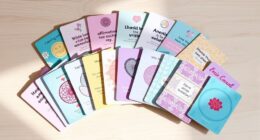
This guide helps beginners set up a crystal kit and use it for a short, calming reflection routine. You will choose a few suitable stones, prepare a comfortable space, set an intention, and care for the crystals afterward. Crystal healing is a personal or spiritual practice; it has not been shown to diagnose or treat medical conditions. The first session takes about 20-30 minutes.

Turn your quiet moments into listening time
- Thousands of audiobooks, podcasts and originals
- Listen on your phone, tablet or Echo — also offline
- Cancel anytime

Raw Healing Crystal Gift Set with Travel Case
- ✔ Crystals: Amethyst, black obsidian, tiger eye, and clear quartz
- ✔ Crystal size: 1–1.2 in (2.5–3.5 cm) each
- ✔ Case material: Aluminum

Scorpio Zodiac Crystal Gift Set
- ✔ Brand: Aovila
- ✔ Zodiac sign: Scorpio
- ✔ Included crystals: Amethyst, citrine, red jasper, black obsidian, green fluorite, and labradorite

7 Chakra Crystal Tree Gift Set with Bracelet and Pendant Necklaces
- ✔ Brand: Real Crystal
- ✔ Tree type: Bonsai
- ✔ Material: Crystal
Difficulty: Beginner | Time: 20-30 minutes for setup and a first session
What You’ll Need
Tools & Materials:
- A crystal kit or two to five crystals with their names supplied, if known
- A clean, stable surface or small cloth
- A bowl or tray to keep small stones together
- A notebook and pen, optional
- A timer, optional
Knowledge:
- No crystal expertise is needed
- Know any allergies or sensitivities to materials in the kit
- Be ready to use the practice for reflection or relaxation, not medical care
Check the kit label or seller’s care instructions before cleaning stones. Some minerals can be damaged by water, sunlight, salt, or heat. Do not put unidentified stones in drinking water, use them to make crystal water, or ingest any crystal material.
Raw Healing Crystal Gift Set with Travel Case
For a kit we can take from a desk to a yoga mat or pack for a trip, this set has the most functional format in the lineup. It includes four named raw crystals—amethyst, black obsidian, tiger eye, and clear quartz—each described as 1–1.2 inches, inside a compact aluminum case with a compass lid. That combination makes the contents easier to identify and keep together than the Scorpio set, whose stones have no listed dimensions, or the chakra tree set, which is designed for indoor display.The included guidebook gives suggestions for meditation, journaling, yoga, and everyday carry, so new owners have a starting point for incorporating the stones into a personal routine. The listing also says the stones have no dyes, fillers, or synthetic treatments, a useful materials detail absent from the other two descriptions. Still, four stones make this a smaller collection than the Scorpio set’s six, and the product’s energy and zodiac associations are not verified effects. We would choose it for compactness and clear contents, not as a promise of healing.
Pros:
- Four specific crystals are named.
- Each stone is listed as 1–1.2 inches.
- Compact aluminum case supports storage and portability.
- Guidebook and gift box are included.
Cons:
- Includes four stones, fewer than the six in the Scorpio set.
- Suggested crystal energy and zodiac associations are not verified outcomes.
Best for: Buyers who want a small, named crystal collection for meditation, journaling, yoga, or travel.
Not ideal for: Shoppers seeking a large display piece, a seven-chakra accessory set, or the broadest stone selection.
Bottom line: We recommend this as the most practical starter kit when portability and clearly identified stones matter most.
“We recommend this as the most practical starter kit when portability and clearly identified stones matter most.”
Scorpio Zodiac Crystal Gift Set
This is the most information-rich set for shoppers who specifically want crystals selected around a zodiac sign. Its six named stones—amethyst, citrine, red jasper, black obsidian, green fluorite, and labradorite—give the collection more variety than the four-stone travel kit. A zodiac card and e-book guide add context about the stones and instructions for using, cleaning, and charging them, which can help a beginner approach the set as a themed learning exercise.The tradeoff is that the theme narrows its audience: Scorpio buyers may find the selection relevant, while people shopping for a general-purpose kit may prefer the Raw Healing Crystal Gift Set’s straightforward portability and stated stone sizes. This set arrives in a decorative gift box, but the product details give no dimensions or weights for the crystals, making it harder to judge their scale before purchase. Its stated benefits should also be understood as spiritual associations, not substantiated outcomes. We place it behind the travel kit because its usefulness depends more heavily on the buyer’s interest in zodiac framing.
Pros:
- Six crystals are individually named.
- Zodiac card supports the sign-specific theme.
- E-book covers stone information and care suggestions.
- Decorative gift box suits gifting.
Cons:
- No crystal dimensions or weights are provided.
- The Scorpio theme may not fit buyers seeking a general kit.
- Claims about crystal benefits are not substantiated in the product information.
Best for: Scorpio shoppers or gift buyers looking for a sign-themed collection with basic stone and care guidance.
Not ideal for: Buyers who want a sign-neutral kit, known crystal dimensions, or a compact case for carrying stones.
Bottom line: We would choose this for a Scorpio-centered gift or learning set, provided the zodiac theme is the point.
“We would choose this for a Scorpio-centered gift or learning set, provided the zodiac theme is the point.”
7 Chakra Crystal Tree Gift Set with Bracelet and Pendant Necklaces
Where the other kits focus on loose stones, this set makes the chakra theme visible in a room. Its bonsai-style tree with 300 multicolor gemstone beads is designed for indoor display, and the package adds a stretch bracelet and two pendant necklaces. That gives it more gift presence and wearable variety than the travel kit, though the latter is more useful when we want to store and carry individual stones.The main compromise is identification. The product description calls the tree and accessories crystal-based and chakra-themed, but it does not specify which crystal types are used. Buyers who value knowing the exact stones have a clearer basis for comparison in both the Scorpio set and the travel set. Nor does this listing include a guidebook or care instructions in the supplied details. We rank it third as a healing kit because its strongest case is as decorative, themed gifting rather than as a clearly documented stone collection. Spiritual uses are intended associations, not verified benefits.
Pros:
- Includes a bonsai-style display tree and 300 gemstone beads.
- Adds a 7 chakra bracelet and two pendant necklaces.
- Multicolor design is suited to indoor display.
- Gift-oriented combination of decor and wearable accessories.
Cons:
- Specific crystal types are not identified.
- No guidebook or stone-care directions are listed.
- Spiritual benefits are intended uses rather than verified outcomes.
Best for: Gift buyers seeking a colorful indoor chakra display with matching jewelry accessories.
Not ideal for: Buyers who prioritize named crystal varieties, stone dimensions, or an included guide for use and care.
Bottom line: We see this as the best decorative chakra gift here, but a weaker choice for buyers who want a documented set of specific stones.
“We see this as the best decorative chakra gift here, but a weaker choice for buyers who want a documented set of specific stones.”
As an Amazon Associate we earn from qualifying purchases.
Before You Start
Choose a quiet place where the crystals cannot be reached by children or pets. Small stones can be choking hazards, and some minerals or metal components may be harmful if swallowed or handled unsafely. Keep crystals away from food and drink. If you are addressing a health concern, contact a qualified health professional; do not delay care or change prescribed treatment because of a crystal practice.
Use the stones as objects for attention, reflection, or personal meaning. No particular stone has a medically proven healing effect, and you do not need to follow a fixed crystal chart or buy additional items.
Step-by-Step Instructions
Step 1: Check the kit contents
Lay out the kit on a stable surface and compare each item with its label or included guide. Separate loose stones from jewelry, candles, oils, or other accessories. Set aside any item with sharp edges, loose parts, an unknown powder, or a strong odor until you can identify it and check its handling instructions.
Tip: Do not assume every polished stone is safe in water or safe to handle for long periods.
Check: You can account for the items you plan to use and have set aside anything unidentified or damaged.
Step 2: Choose a few stones
Select two to five stones that appeal to you or match a theme you want to reflect on, such as rest, focus, or self-confidence. Use the kit’s labels as identification aids, not as medical instructions. If a stone’s identity or care requirements are unclear, leave it out of the session.
Tip: A small selection makes it easier to focus. You do not need a particular combination for the practice to work as a reflection exercise.
Check: You have a manageable group of identified stones and can explain why you chose each one in personal, non-medical terms.
Step 3: Prepare the space
Clear a small area, place a cloth or tray on the surface, and set your chosen stones on it. Sit somewhere comfortable with enough light to see the stones. Put away drinks and food so that crystals cannot fall into them.
Tip: Keep the setup away from the edge of a table and beyond reach of children and pets.
Check: The stones are stable, visible, and separated from food, drink, and foot traffic.
Step 4: Clean the stones only as directed
Read the kit’s care instructions for each stone. If the directions permit water, rinse briefly and dry it fully with a soft cloth. If water is not recommended or the stone is unidentified, use a dry, soft cloth or simply leave it as it is. Avoid salt, heat, sunlight, cleaning products, and chemical sprays unless the stone’s reliable care directions explicitly allow them.
Tip: Cleaning is optional. A dry cloth is a sensible default when material or care information is missing.
Check: Each stone is dry and undamaged, or you have skipped cleaning because its care needs are unknown.
Step 5: Set a simple intention
Take a moment to name what you want from the session. Make it a reflection goal, such as “I want to pause and notice what is on my mind” or “I will take five quiet minutes.” Write it down if that helps. Avoid framing it as a promise that a crystal will cure a symptom or produce a specific outcome.
Tip: Keep the intention within your control, such as making time to breathe, reflect, or journal.
Check: You have a short, realistic intention that describes your own action or focus.
Step 6: Use the stones during a quiet pause
Set a timer for five to ten minutes if useful. Hold one stone comfortably, or place it where you can see it. Breathe at your normal pace and notice the stone’s weight, temperature, color, or texture. When thoughts arise, return your attention to the physical details or to your intention. Stop if you feel discomfort, irritation, or anxiety.
Tip: You can keep your eyes open. Do not place stones in your mouth, on broken skin, or where they could press painfully against your body.
Check: You completed a short pause and can describe what you noticed, regardless of whether you felt calmer.
Step 7: Record a brief reflection
Write one or two sentences about your experience: what you noticed, what thoughts came up, or what you would like to do next. Treat the notes as personal reflection rather than proof that a stone caused a physical or emotional change.
Tip: If journaling is not useful to you, simply name one observation to yourself and continue with your day.
Check: You have recorded or mentally noted one observation from the session.
Step 8: Put the kit away safely
Return stones to their labeled compartments or a secure container. Keep them dry and store them according to their care instructions, away from children and pets. Clean the cloth or tray as needed, and keep any labels so you can check stone identities later.
Tip: Do not store stones in direct sunlight or a damp place unless the care information says those conditions are suitable.
Check: All stones and accessories are accounted for, safely stored, and ready for another session.
Common Mistakes to Avoid
- Treating crystal descriptions as medical advice. — Use the kit for reflection or relaxation only. Seek medical advice for symptoms and continue prescribed care unless your clinician recommends a change.
- Washing every stone or using salt, sunlight, or heat to cleanse it. — Check care instructions stone by stone. When details are missing, use a dry cloth or skip cleaning.
- Choosing too many stones or following a complicated placement chart. — Start with two to five stones and a short intention. Keep the routine simple enough to repeat comfortably.
- Leaving small stones where children or pets can reach them. — Use a tray during the session and return the kit to a closed, secure storage place afterward.
Troubleshooting
Problem: A stone has no label, or you cannot tell what it is.
Solution: Do not soak, heat, grind, or ingest it. Set it aside until you can get reliable identification and care information; use a known stone or skip it.
Problem: A stone changes color, flakes, or develops a crack after cleaning.
Solution: Stop using water or other cleaning methods on it. Dry it gently if needed, keep fragments away from children and pets, and check the supplier’s care instructions.
Problem: You feel no different after the session.
Solution: That is a valid outcome. The goal is to complete a pause for reflection, not to produce a guaranteed sensation. Try a shorter session or a different quiet activity if the routine does not suit you.
Problem: The practice brings up distress or makes you more anxious.
Solution: Stop, put the stones away, and return to an activity that helps you feel grounded. Talk with someone you trust or a qualified health professional if distress continues.
What Success Looks Like
You have checked the kit, selected a few suitable stones, followed safe care instructions, completed a short reflection pause, and stored the items securely. Success means the routine was safe and personally useful enough to assess; it does not require a particular feeling or health outcome.
Next Steps
If the routine suits you, repeat it when you want a quiet reflection break and keep sessions brief. Review stone care instructions before cleaning, and replace unclear labels with reliable identification information. Stop using any item that irritates your skin, breaks, or causes concern. For ongoing physical or mental health symptoms, seek qualified care rather than relying on crystals.
Frequently Asked Questions
How many crystals should I use in a kit session?
Start with two to five stones. A smaller selection keeps the session simple, and there is no required number for a reflection routine.
Can I put crystals in water or drink crystal water?
Do not make or drink crystal water. Minerals can dissolve, shed particles, or contain substances that are unsafe to ingest. Keep stones out of drinking water.
How often should I use a crystal healing kit?
Use it whenever a short reflection pause feels helpful. There is no evidence-based schedule or required frequency.
Do I need to cleanse the crystals before every session?
No. Cleaning is optional. If you clean a stone, follow its care directions; when those are unknown, use a dry cloth or leave it alone.
Can crystals replace medication or professional treatment?
No. Crystal practices are not proven treatments for health conditions. Do not stop, delay, or alter care on the basis of a crystal kit; discuss treatment questions with a qualified clinician.